ScenesPlacing Tiles
Editing Area View
When a scene is selected or a new scene is created, you can place various parts in the editing area. When a very large scene is created, using the layout navigation can make things easier.
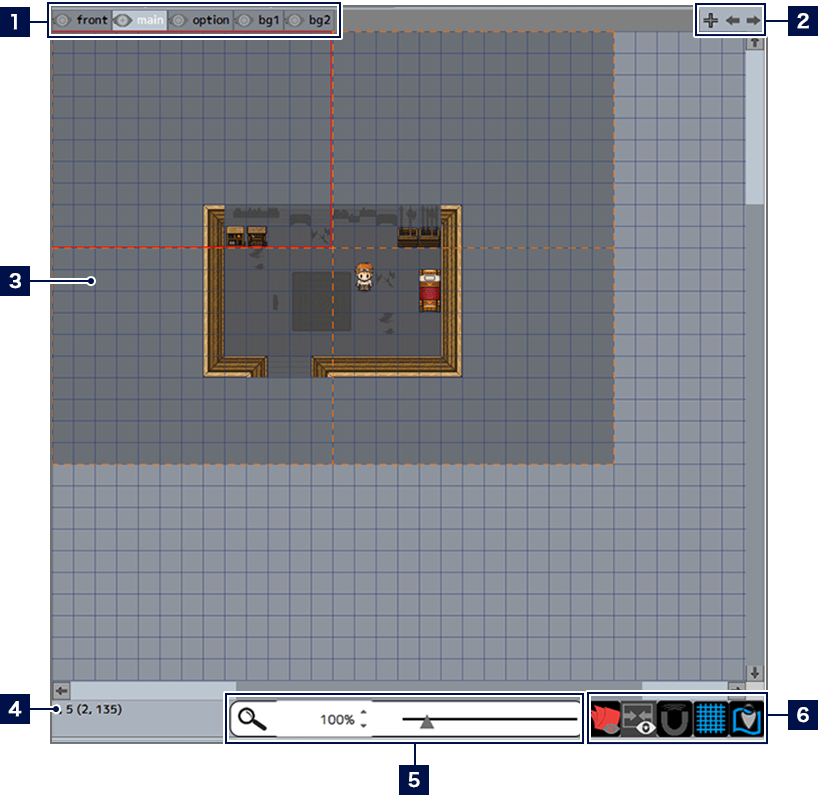
- 1Layer Tabs
- A scene can be created and split into multiple layers (levels). The further left a layer is listed in these tabs, the higher it is in the stack. Click the tabs to select a layer in which to place parts.
You can also switch between showing and hiding layers by clicking .
. - * Layers that are hidden will still be displayed in-game.
- 2Layer Editing Buttons
-
 New Layer
Adds a new layer (which will appear at the bottom of the stack).  Toggle Left
Selects the tab to the left of the currently selected layer.  Toggle Right
Selects the tab to the right of the currently selected layer. - 3Scene Preview
- 4Cursor Coordinates
- The left-hand number is the tile number, and the numbers in brackets are the actual coordinates.
- 5Current Display Scale
- You can change the scale by directly inputting the desired scale, or by clicking the up and down buttons. Also, by double-clicking the magnifying glass icon, you can revert the scale and display position to the default.
- 6Menu Buttons
-
 Highlight Item Being Edited
When highlighted, everything but the selected layer will be displayed as semi-transparent.  Display/Hide Wall Detection
When set to display, the tiles set as walls will be displayed in red.  Snap to Grid
A function that allows you to arrange scenes following the grid (a lattice of measurement lines).  Display/Hide Grid
Switches between displaying and hiding the grid.  Layout Navigation
Opens the layout navigation in another window.
Tile Placement
The placeable parts list in the upper left corner of the screen is split into four categories. When placing tiles, select the "Tile" tab.
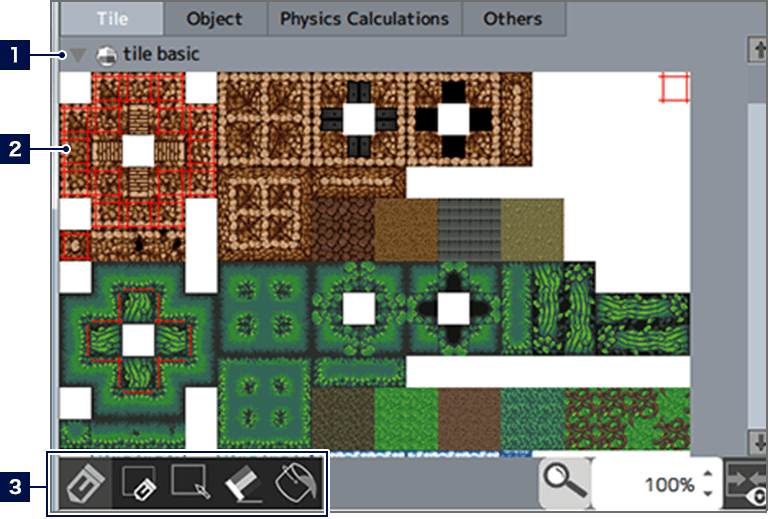
- 1Tilesets
- Displays the tilesets specified under "Tileset" in the settings window for the scene. You can switch between displaying or hiding the preview area by clicking the ▼ on the left.
- 2Tile Preview
- Click to select the tile you want to place. You can select multiple tiles by dragging.
- 3Drawing Tool Buttons
- A drawing tool for placing tiles in the editing area. You can switch between the five drawing tools by clicking them.
-
 Pen
PenPlaces a line of tiles in its wake by clicking and dragging.  Rectangle Pen
Places tiles throughout the range indicated by dragging.  Select Range
Selects the range indicated by dragging. You can perform actions such as copy, cut, and paste by opening the context menu with a right-click.  Eraser
Erases tiles within the range indicated by clicking and dragging.  Fill
FillReplaces the clicked tile, as well as all adjacent identical tiles, with the selected tile.
Tile Placement Controls
You can place tiles in the selected layer by selecting the tile you want to place from the tile preview, then clicking (and/or dragging) in the editing area.
What happens when you click (and/or drag) will change depending on the selected drawing tool. Also, when "Pen", "Rectangle Pen", or "Fill" are selected, you can cancel the tile selection by right-clicking in the editing area.